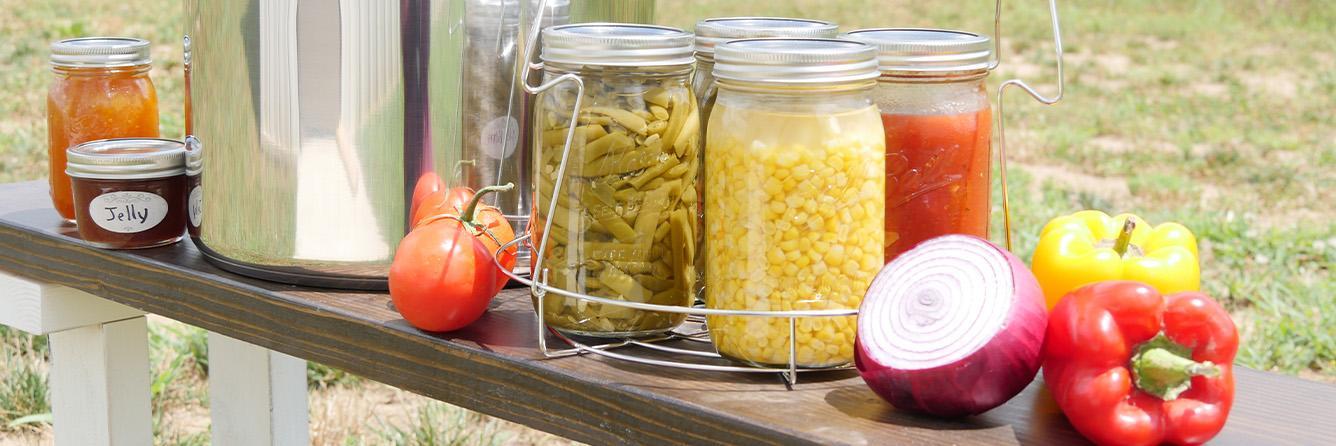
Water Bath Canning Guide - Getting Started with Home Canning
Preserving your own homegrown berries, tomatoes, pickles, and more is made easy with the right canning supplies. Certain foods require pressure canning to remain shelf stable over time, however, acidic foods can become shelf stable with the simple process of water bath canning. Whether you're pickling cucumbers from the summer garden or making strawberry jam to enjoy during the colder months, Everything Kitchens has the perfect tools to stock your pantry. Read our quick guide below to learn more about the process of water bath canning.
Why Water Bath Can Food?
If you enjoy pickles, jams, jellies, or canned fruits, water bath canning is right for you. All of these foods are highly acidic, making them easy to preserve through the process of water bath canning. The existing acid, or added acid from vinegar when pickling, will keep the food preserved and safe to eat once processed in a boiling water bath. Water bath canning is easier to learn and operate compared to pressure canning, making it a perfect option for beginners who are unsure of diving into pressure canning.
What is Water Bath Canning?
Water bath canning allows highly-acidic foods with a pH of 4.6 or less to become shelf stable. By bringing water to a boil (212°F) in either a pressure canner or stock pot and letting jars simmer for a period of time, molds, yeast, and some bacteria are destroyed. Acidic foods canned using the water bath method can remain shelf stable for up to one year.
Foods to Water Bath Can
High-acid foods 4.6 pH or less:
Most Fruits: Lemons, apples, apricots, plums, blackberries, strawberries, nectarines, peaches, pears, gooseberries, and tomatoes
Spreads & Sauces: Fruit jams, fruit jellies, and tomato sauces like marinara or salsa
Pickled & Fermented Foods: Pickled vegetables such as beets & cucumbers, relishes where vinegar is added, and fermented foods like sauerkraut or kimchi
|
Chef Austin's Tip: Low-acid foods 4.6 pH or higher such as vegetables like green beans, meats, and soups must be pressure canned. Check out our Pressure Canning Guide to find out more. |
Required Water Bath Canning Supplies
If you would like to learn more about these essential canning tools, check out our Getting Started Canning article for more information on these supplies and other kitchen tools that will help you get canning at home.
Water Bath Canner:
- Kitchen Crop Harvest Stainless Steel Multi-Use Canner with Glass Lid
- Traditional Stovetop Model
- No Plug-In Required
OR
- Nesco (Carey) Smart Electric Water Bath Canner & Pressure Canner
- No Stove Required
- Lowest Learning Curve
|
Which canner should you get? Check out the differences in our Lets Can! Getting Started with Home Canning article. |
Jars:
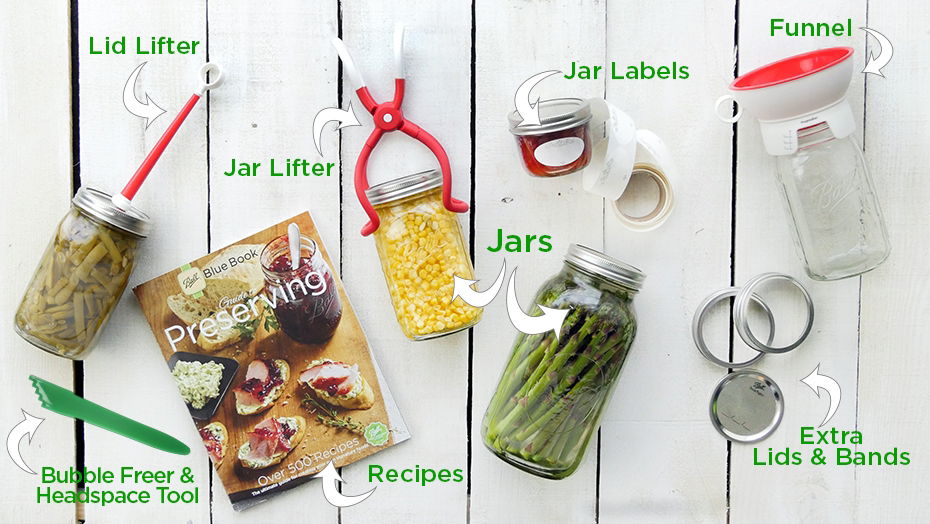
- Canning Jars - Choose jars that will work best for your recipes.
- New Canning Lids - If you are using your own jars, be sure to use brand new canning lids and jars free of cracks, chips, or scratches. You can safely reuse canning bands if they are free of rust.
- Jar Labels - Label and date all of your food after canning to stay organized.
- Jar Lifter & Lid Lifter - Lets you safely lift and lower jars and lids into boiling water.
- Canning Funnel - Allows you to easily load food into your jars without making a mess.
- Bubble Freer & Headspace Tool - Removes trapped air in your jar before jarring.
- Put 'em Up Home Preserving Guide - Make sure you're using a tested recipe that will stay preserved and safe. Many tomato-based sauces will can in a water bath, but they have to be balanced at the right acidity. Adding too many low-acid foods like onions, peppers, and mushrooms will disrupt the pH level (amount of acid in the food), making it unsafe for preserving in a water bath canner. Foods with added low-acid ingredients need to be pressure canned to prevent the risk of bacteria growth, which can cause botulism or mold.
- Plenty of Time - Allow yourself ample time to process all of your harvests properly.
- Top 10 Home Canning Supplies & Tools - The items listed above are the most essential supplies to start canning, but your experience can go smoother with a few additional food prep tools. Check out our Top 10 Canning Tools article to learn more about a variety of time-saving tools, from apple peelers to veggie choppers and so much more.
Step-by-Step Water Bath Canning Tutorial
Prepare Your Recipe:
Whether you are preserving summer peaches or making pints of salsa to enjoy all winter, your canning process will run smoother if you make your tested recipes in advance. Peel your peaches, get the pickling spice ready, make your hot brines or syrups, or blend up the salsa - whatever you’re planning to can, make sure it's ready to be packed into your glass jars.
Prepare Your Jars:
An important part of canning is making sure you use clean jars. Simply wash your jars, lids, and bands with hot soapy water and then dry them with a clean cloth. Set out a large towel on the counter close to your canner to set your hot jars on as they are removed from the water bath canner. Be sure not to touch the underside of the jar lid or inside of the jar, as this can cause bacteria to spread and could spoil foods.
Prepare and Operate Your Canner:
Once your recipe is prepared, it's time to prepare your water bath canner.
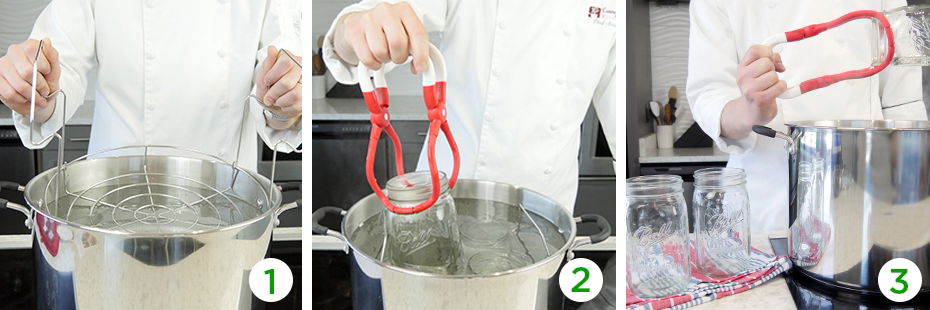
1. Fill your water bath canner a few inches from the top with water and bring to a simmer (180°F). Rest the arms of the canner rack on the rim of the canner so the rack is elevated.
2. With a jar lifter, place the cans on the rack - you can keep them here until you are ready to start filling. This keeps the jars hot, which prevents thermal shock damage when putting hot food or liquid into them. Once all of your jars are on the rack and ready to be canned, slowly lower the rack into the canner until it's resting on the bottom of the canner and all jars are fully submerged in the water.
2a. If necessary, sterilize your canning jar. If your recipe cooks for 10 minutes or longer in the water bath, you can skip the sterilization process.
|
According to the National Center for Food Home Preservation, "Empty jars used for vegetables, meats, and fruits to be processed in a pressure canner need not be pre-sterilized. It is also unnecessary to pre-sterilize jars for fruits, tomatoes, and pickled or fermented foods that will be processed 10 minutes or longer in a boiling-water canner.". If your recipe calls for less than 10 minutes of boil time, follow the directions below: "To sterilize empty jars, put them right side up on the rack in a boiling-water canner. Fill the canner and jars with hot (not boiling) water to 1 inch above the tops of the jars. Boil 10 minutes at altitudes of less than 1,000 ft. At higher elevations, boil 1 additional minute for each additional 1,000 ft. elevation. Remove and drain hot sterilized jars one at a time. Save the hot water for processing filled jars." For more info, check out their website here. |
3. With a jar lifter, lift a hot jar out of the water and carefully pour the water back into the canner. Place the jar on a dry towel lying on your counter. A cold counter (especially marble) can cause thermal shock and possibly crack the jars. A towel on the counter will create a barrier between the hot jars and the cold counter, preventing thermal shock damage.
4. Place a canning funnel onto the jar and fill the jar with the prepared food according to the recipe. We highly recommend using an oven mitt during this process to protect your hands from the hot jars.
5. Check for headspace with the headspace and bubble freer tool. Headspace refers to the space in your jar from the top of the food to the bottom of the lid. Your recipe may tell you the correct headspace, but we have listed a general guideline for headspace in water bath canned foods below:
Headspace Guidelines
1/4" Jams & Jellies
1/2" High-Acid Food
6. Use the bubble freer tool to remove any trapped air. This is done by gently moving the food away from the side of the jar to release any air that may be trapped. After freeing any trapped air, check for headspace once more and add additional food or liquid if necessary.
7. Wipe the jar rim with a clean, damp rag. Any food on the rim can prevent the lids from sealing properly, which can cause spills within the canner or food spoilage.
8. Using the magnetic lid lifter, place the lid on the jar. Do not touch the bottom of the lid, as this can transfer bacteria to your food. After the lid is placed, install the band and screw on until fingertip-tight.
9. Place the filled jars into the canner rack until it is full. Ensure the jars are not touching each other, as water must circulate around the jars to properly preserve their contents. Jars should be fully submerged and covered by 1" of water - if they are not, add more hot water. Place the lid on the canner and set the stove burner to high heat, bringing water to a boil.
10. Once the water is boiling, start a timer for your food according to your recipe. When the cooking time is complete, turn off the stovetop and let the jars rest in the canner for five minutes.
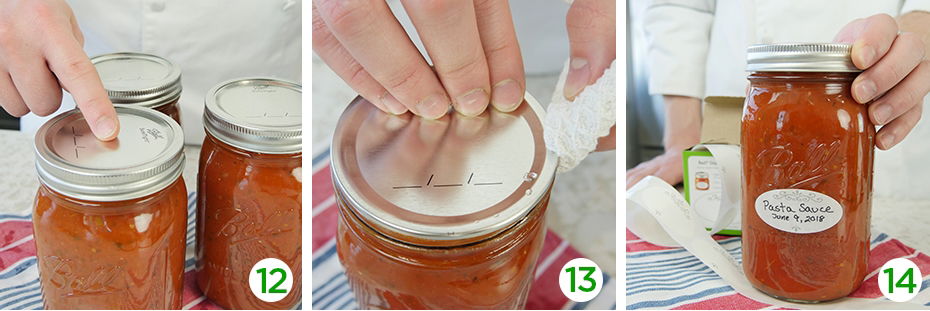
11. Remove the jars with a jar lifter keeping them as upright as possible and place them on the towel on your countertop. Do not retighten the metal bands. Let jars cool, undisturbed, for 12 hours.
12. Test jars for a vacuum seal. Test the jars for a vacuum seal by pressing into the middle of the lid with your finger. If there isn't any give when you press down, then the jar is sealed. If the lid pops up when you release your finger, the lid is not sealed.
13. Remove the metal bands, wipe them down with a clean damp cloth, then hand tighten the bands back onto the jars. This prevents rusting by removing any water that may be trapped in the lid band.
14. Be sure to label each jar with the contents and the date your food was canned. For best-tasting results, store your canned goods in a cool, dry, and dark place, and eat them within one year.
While the idea of canning may seem daunting, water bath canning is a perfect way to dip your toes into the world of home preservation. By following our guidelines and adding a select set of essential tools to your kitchenware collection, you can easily make purchasing store-bought pickles, preserves, or canned fruits a thing of the past.
Have any more questions about our water bath canning products? Give us a call at 866-852-4268 or email us at [email protected] and one of our customer service heroes would be happy to help!
If you are interested in learning about pressure canning, check out our Pressure Canning Guide.




 KitchenAid
 Fiesta®
 Bosch
Bosch All-Clad
 Cuisinart
 OXO
OXO Le Creuset
 Blendtec
 Wusthof
 Bormioli Rocco
 Vitamix
 Emile Henry
 DeLonghi
 Mason Cash
 Nordic Ware
 ZWILLING
 Kilner
 Staub
Staub Ankarsrum
 LEM
LEM Weston
 Moccamaster
 Mercer
 All American 1930
 CucinaPro
 SMEG
SMEG Toddy
Toddy Everything Kitchens

